How Make Projector at Home: Simple Answer
You can make a basic homemade projector with a box, lens, and phone, but image quality depends on alignment and room darkness in November 2026.
 By Priya Raman
Published

You can make a basic homemade projector with a box, a magnifying lens, and a phone, although the result depends heavily on careful alignment and a dark room. The phrase how make projector at home usually describes a simple pinhole-style or lens-based experiment rather than a replacement for a commercial projector. A homemade setup can enlarge a small image onto a wall, but it won’t provide the brightness, focus control, sound, or connectivity of a purpose-built model.
A cardboard enclosure, black interior, and adjustable phone position can reduce stray light and help the picture appear clearer. The phone’s screen becomes the light source, while the lens bends that light toward the wall or screen. If you want to connect a laptop or streaming device to a commercial model afterward, this computer connection guide explains the related setup. Keep expectations realistic because a homemade projector works best as a hands-on experiment or occasional dark-room activity.
| Award | Product | Best Projector Reviews Score About Best Projector Reviews ScoreBest Projector Reviews Score is a comparison aid based on available product information, not a hands-on testing result. Read our review methods. | |
|---|---|---|---|
| Best Overall |
 Mini Projector with WiFi and Bluetooth |
9.1/10 | Buy |
| Best Budget |
 [Built-in Apps & 2026 Upgraded] |
9.1/10 | Buy |
| Best Value |
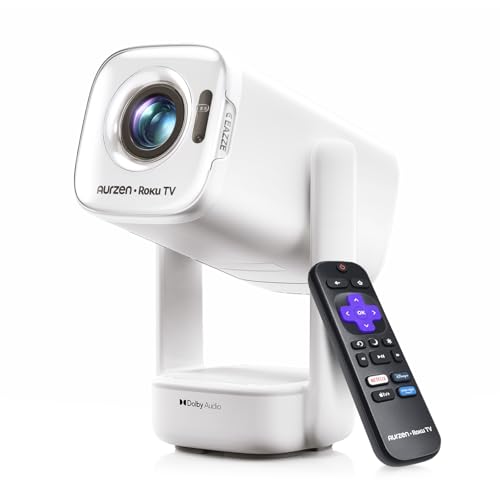 Aurzen Roku TV D1R air USB-C Powered |
9.1/10 | Buy |
 Aurzen Roku TV D1R Smart Portable Outdoor |
8.9/10 | Buy | |
| Best Premium |
 Projector with WiFi and Bluetooth, 4K Decoding |
8.9/10 | Buy |
 HAPPRUN Roku TV Smart Mini Projector with WiFi |
8.8/10 | Buy | |
 Native 1080P Projector with WiFi 6 and Two-Way |
8.4/10 | Buy | |
 Smart Projector-4K with Wifi Bluetooth |
8.1/10 | Buy |
How a Homemade Phone Projector Works and What It Can Actually Do
A homemade phone projector uses a box to block surrounding light and a convex lens to enlarge the phone’s display onto a wall. The lens reverses the image, so the phone usually needs to be turned upside down before projection. The box does not create extra brightness or detail; it only controls the path of light. A dark room and a light-colored, reasonably smooth projection surface therefore matter more than decorative features or box size.
The practical goal is a stable image that is large enough to see without becoming too dim. A short box may produce a smaller projected image, while a longer distance between the phone and lens can change focus and image size. Every lens behaves differently, so the exact spacing must be adjusted rather than copied from a generic diagram. The phone also needs to remain still because even small movement can shift the image out of focus.
Materials That Control the Image
A sturdy cardboard box is usually easier to adjust than a thin package that bends around the lens opening. The box should be large enough to hold the phone without pressing against its buttons or screen. A convex magnifying lens provides the focusing effect, while dark paper or matte black paint inside the box can reduce reflections. Tape, a pencil, a ruler, and a craft knife help with marking and cutting, but cutting should be done on a stable surface with suitable hand protection.
The lens is the most influential component because its diameter, curvature, and mounting position affect the projected image. A lens with scratches, strong distortion, or an uneven frame may produce soft edges. The phone’s brightness setting also affects the visible result, but maximum brightness can increase heat and battery use. The phone should remain within its normal operating conditions, and the homemade enclosure should not block its ventilation openings.
Use a separate phone stand or a simple internal cradle if the device slides around. A removable cradle is more useful than permanently gluing the phone because it allows access to charging controls and makes alignment easier. The box opening should be only large enough for the lens assembly, leaving as little unwanted light leakage as practical. A loose lens can shift during use, so secure it without covering the optical area or placing pressure on the glass.
Preparing the Box Without Blocking the Phone
Measure the lens frame before marking the circular opening on one short side of the box. Centering the opening is a useful starting point, but the phone’s screen position may require a small offset. Cut a conservative opening first, then enlarge it gradually until the lens fits securely. A hole that is too wide allows the lens to wobble and makes precise focusing harder.
Line the inside with dark, non-glossy material if the cardboard reflects noticeable light. Glossy surfaces can scatter light around the box and lower perceived contrast on the wall. Leave enough room for the phone’s camera area, charging port, and controls if those remain accessible. Do not seal the phone in a way that traps heat, especially during extended playback or charging.
- Choose a rigid box that holds its shape during lens adjustment.
- Use a convex lens with a secure frame and clear optical surface.
- Keep the phone accessible so brightness and playback can be adjusted.
- Use dark interior surfaces to limit reflections around the image.
- Leave ventilation openings unobstructed around the phone.
Positioning the Phone and Lens for Focus
Place the phone inside the box with its screen facing the lens, then rotate the display so the projected image appears upright on the wall. Many phones can rotate the screen automatically, so disable automatic rotation if the image keeps changing orientation. Start with the phone near the rear of the box and place the box several feet from a blank wall. The first image may be blurry or small, which is normal during initial alignment.
Move the phone forward or backward in small increments until text or a high-contrast shape looks as sharp as possible. Moving the entire box changes the image size and brightness on the wall, while moving the phone relative to the lens mainly changes focus. Adjust one variable at a time so you can tell which movement helped. A fixed phone holder makes this process easier because hand movement can introduce blur.
The projected picture will often be dimmer than expected because the lens spreads the phone’s light over a larger area. A smaller image usually appears brighter and more defined than a very large image. Reducing room light, closing curtains, and turning off nearby lamps can make a larger difference than raising the phone’s brightness. A white wall can work, but a smooth matte surface generally avoids distracting texture.
Improving Clarity Without Pretending It Is a Home Theater
Use high-contrast content for the first focus adjustment. Large white lettering on a dark background, a simple shape, or a paused image with clear edges makes blur easier to see than a dark movie scene. Once the edges look as sharp as the lens allows, reduce the projected size if the image remains weak. Small text and detailed video may still look soft because the homemade optical path has limited precision.
Light leakage is another common source of a washed-out picture. Cover gaps around the lens mount and box seams with opaque tape, but do not tape over phone vents or controls. Keep the wall free from direct light and avoid placing the projector near a window during daytime. These changes improve contrast by protecting the projected image from competing light, not by increasing the phone’s actual display output.
A phone screen has a fixed display size, so enlarging it reduces the amount of light reaching each part of the wall. Commercial projectors list brightness using defined specifications, while a homemade design has no comparable standardized brightness figure. That difference explains why a homemade projector can be entertaining in a dark bedroom but disappointing for a family movie night in a bright living room. Buyers who need reliable outdoor viewing should check a projector’s stated brightness and the light conditions described for the setup.
Power, Streaming, and Audio Limitations
Phone playback is the simplest source because the display is already inside the box. Streaming may still depend on the phone’s apps, account access, network connection, and whether the service permits the chosen mirroring method. Copyright-protected content can behave differently from personal photos or locally stored video. If a service refuses to mirror, use a permitted source method rather than trying to bypass its restrictions.
Audio usually remains outside the box because the phone speaker can sound muffled or face the wrong direction. A small external speaker may improve listening, but Bluetooth connections can introduce delay in some setups. Wired audio can avoid wireless pairing problems when the phone and speaker support the required connection. Keep cables away from walkways and do not place them where they can pull the box or phone onto the floor.
Extended playback also uses battery power and can warm the phone. A charging cable may help, but the cable must pass through an opening that does not crush or sharply bend it. Follow the phone maker’s guidance for charging and temperature, and stop playback if the device becomes unusually hot. Never cover the phone with thick material or use an enclosure that prevents normal heat release.
Safety Checks Before Turning On the Light Source
A homemade projector uses ordinary visible light, but the lens can concentrate light and create a bright spot. Never stare into the lens or point it toward someone’s eyes. Keep the lens away from direct sunlight when the box is not in use, because concentrated sunlight can heat nearby materials. Follow the phone and lens manufacturer’s safety guidance whenever the supplied instructions address handling or exposure.
Cut cardboard carefully and keep the craft knife away from children. A child can help with decoration or image selection, but an adult should handle cutting, lens installation, and electrical connections. Do not use damaged charging cables, loose plugs, or improvised wiring. A homemade enclosure should never be used to bypass a phone’s thermal protection or any safety feature on an attached device.
- Check that the lens is secure before moving the box.
- Keep direct sunlight away from the lens and cardboard housing.
- Never look into the lens or aim concentrated light at eyes.
- Keep phone vents, charging ports, and controls accessible.
- Stop using the setup if the phone or cable becomes unusually hot.
- Follow manufacturer guidance for charging, handling, and safe operating conditions.
When a Commercial Projector Makes More Sense
A homemade design makes sense when the goal is learning how lenses redirect light or creating a low-cost craft activity. It may also be useful for a quick demonstration in a dark room where image quality is not the main concern. The setup becomes less suitable when you need a predictable screen size, readable presentations, gaming responsiveness, or dependable streaming. Those uses require specifications that a cardboard enclosure cannot provide consistently.
Commercial options in the supplied product data show why buyers compare native resolution, stated brightness, automatic focus, keystone correction, wireless features, and audio connections. Some listed models use native 1080p, while another product description identifies a 720p native resolution with support for higher-resolution content. Several options list automatic focus or keystone functions, which can reduce manual alignment work, but the manufacturer’s stated features should be checked for the exact model.
Portability also involves more than a small case. One listed portable model uses USB-C power with a stated power requirement, while other models rely on conventional power connections. Built-in smart platforms may simplify streaming, but some require an account and internet connection for activation. A buyer should match the power source, input ports, streaming method, screen distance, and room lighting to the intended location rather than assuming every small projector works the same way.
Outdoor use adds another limitation because darkness, surface color, power access, and sound carry all affect the experience. A brightness guide for outdoor setups can help explain why dusk viewing and full darkness produce different results: outdoor projector brightness guidance. Even a commercial projector should remain protected from moisture, have clear ventilation, and operate within the manufacturer’s placement and power instructions.
Troubleshooting a Blurry, Dim, or Upside-Down Image
A blurry image usually points to focus distance, lens quality, phone movement, or a wall that is too far away for the available light. Move the phone in small increments before changing the box position. Clean the lens with an appropriate soft method, but avoid harsh materials that can scratch its surface. If only one side looks sharp, the lens may be tilted or the box may not be facing the wall squarely.
A dim image can result from excessive projection size, room light, a low-brightness phone display, or light escaping around the box. Reduce the image size and darken the room before rebuilding the enclosure. If the picture remains too faint for the intended activity, the limitation may be the concept rather than a single assembly mistake. A commercial projector with supplied brightness information is the more predictable path for movie viewing or presentations.
An upside-down image is expected when a convex lens forms the projected picture. Rotate the phone display or turn the phone around if the physical arrangement allows it. A distorted image can come from an angled box, an uneven lens opening, or digital image correction that is unavailable in the homemade setup. Keep the lens parallel to the wall and use a flat surface before attempting more complicated adjustments.
How to Decide Whether to Keep the Homemade Setup
Keep the homemade projector if it produces a visible, focused image in the room where you plan to use it and the activity is casual. Test it with the actual phone, wall, viewing distance, and content rather than judging it under a different setup. Check that the phone stays cool, the lens remains secure, and no cable creates a trip or pulling hazard. These checks address the practical limits without treating the craft as a manufactured optical product.
Choose a commercial projector when you need repeatable focus, larger viewing groups, external sources, built-in audio, smart apps, or a picture that remains usable under more varied conditions. Compare only the specifications that match the use case, such as native resolution for text, stated brightness for room light, throw information for available space, and connectivity for the intended source. The small homemade experiment answers how lenses work, but it cannot substitute for those documented product distinctions.
The most useful next step is to build the box with a removable lens mount, test focus at a modest image size, and stop if heat or electrical problems appear. If the result is too dim or unstable for the planned viewing, use a projector whose listed specifications address the room, source, and placement requirements instead.
About the author
A good screen can change a picture more than a small projector upgrade, and it is the part many buyers skip. I write about screen materials, gain, ambient light rejecting designs, and how room lighting, wall color, and seating position change what you see. I try to keep the advice grounded in what a normal room looks like, not an ideal one. My notes follow the site's review methods: research-based comparison, not lab testing.