How to Make a Phone Projector: A DIY Guide for 2026
Learn how to make a phone projector using simple household materials in this clear November 2026 guide to DIY optics and focus.
 By Marcus Bell
Published

Assembling a working home theater display from scratch requires only a sturdy cardboard box, a magnifying lens, a smartphone, and basic household cutting tools. Understanding how to make a phone projector allows anyone to project mobile videos onto a blank bedroom wall without buying dedicated equipment. The setup relies on simple optical physics, directing screen light through a curved glass or plastic element to expand the image across a dark room.
While homemade cardboard designs deliver modest brightness compared to retail hardware, they serve as fun weekend craft projects and visual science demonstrations. Many people explore projected entertainment after asking whether a projector is less harmful than a standard television for nighttime viewing. Creating your own optical system provides practical insight into focal lengths, screen orientation, and light management.
| Award | Product | Best Projector Reviews Score About Best Projector Reviews ScoreBest Projector Reviews Score is a comparison aid based on available product information, not a hands-on testing result. Read our review methods. | |
|---|---|---|---|
| Best Overall |
 Native 1080P Mini Projector Bluetooth |
8.9/10 | Buy |
| Best Budget |
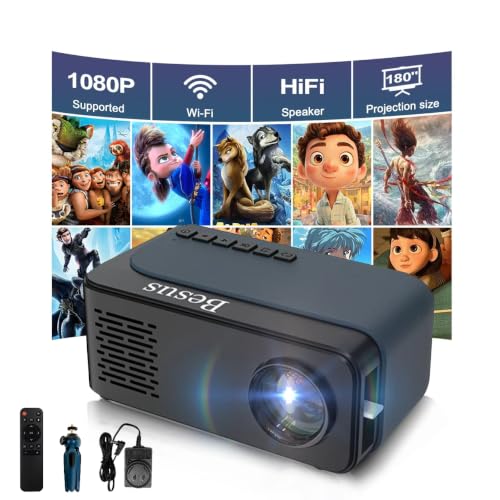 Mini Projector, HD 1080P WiFi Video Projector |
8.6/10 | Buy |
| Best Value |
 Mini Movie Projector with Wired Screen Mirroring |
8.6/10 | Buy |
 Smartphone Projector |
8.4/10 | Buy | |
 Mini Projector,1080P Support Portable Projector |
8.3/10 | Buy | |
| Best Premium |
 【Built-in APPS】Mini Projector With Wifi |
8.3/10 | Buy |
 Mini Projector, Portable Projector 1080P 4K |
8.0/10 | Buy |
Building and Optimizing a Homemade Phone Projector
The objective of this DIY project is to focus the light emitted by your mobile screen onto an exterior surface using a convex lens. You achieve this by positioning the mobile device at a precise distance behind the lens inside an enclosure sealed against light leaks. A well-constructed enclosure ensures maximum image contrast by preventing ambient illumination from washing out the projected picture.
| Focal Length | Box Length Needed | Throw Distance | Approximate Screen Size |
|---|---|---|---|
| 100 mm | 6 to 8 inches | 3 to 5 feet | 20 to 35 inches |
| 150 mm | 9 to 12 inches | 5 to 8 feet | 35 to 55 inches |
| 200 mm | 12 to 16 inches | 8 to 11 feet | 55 to 75 inches |
| 250 mm | 16 to 20 inches | 10 to 14 feet | 70 to 90 inches |
Gathering the correct components before cutting into your materials saves time and prevents wasted cardboard during assembly:
- A shoe box or rigid corrugated cardboard container with an intact lid for light management.
- A biconvex magnifying glass or optical lens with a diameter between two and four inches.
- Utility knife or craft scalpel capable of cutting clean circular apertures without tearing paperboard.
- Matte black acrylic paint or dark construction paper to eliminate internal reflections.
- Opaque masking tape or black electrical tape for sealing seams and holding the lens firmly.
- A sturdy smartphone stand, foam block, or binder clips to maintain vertical phone orientation.
Preparing the Enclosure and Optical Opening
Begin by selecting a rigid shoe box or shipping package free of structural damage or crushed corners. The container must remain completely lightproof once closed, so verify that no puncture holes penetrate the sidewalls. Place your magnifying glass against the center of one short exterior end of the box.
Trace the perimeter of the magnifying lens with a fine pencil or marker to establish your cutting boundary. Use a sharp craft knife to carefully cut just inside your traced circle to avoid creating an oversized hole. A tight aperture ensures a firm friction fit that prevents stray light from escaping around the lens rim.
If your magnifying glass includes a bulky handle, decide whether to saw it off or leave a slot for it. Cutting off the handle allows the box to sit flat on a table, whereas preserving the handle requires an extra slit below the circular cut. Remove any loose cardboard fuzz from the hole edge to maintain clean optical alignment.
Treating the Interior to Prevent Reflection
Cardboard interiors are naturally brown or white, which scatters light in every direction once a screen illuminates the interior. Internal light bounce reduces perceived contrast significantly and washes out subtle shadows in your video feed. Coating the entire interior with matte black acrylic paint resolves this scattering problem effectively.
Allow the acrylic paint to dry thoroughly before proceeding so moisture does not warp the cardboard walls. Alternatively, line the interior surfaces with sheets of black matte construction paper fixed with double-sided tape. Cover the inside of the lid as well, leaving no exposed reflective patches anywhere in the chamber.
Pay close attention to the box corners where folds meet, as unglued seams often let outside room light seep inside. Apply black electrical tape over exterior corner joints to ensure total darkness within the housing. Sealing these gaps guarantees that only the light exiting through your magnifying lens reaches your projection wall.
Mounting the Magnifying Lens Securely
Slide the optical lens into the pre-cut circular aperture from the inside of the box. Ensure the curved glass sits perpendicular to the floor rather than tilted forward or backward at an angle. An angled lens produces severe optical distortion known as keystoning, where the top of the image appears wider than the bottom.
Secure the lens rim against the inner cardboard wall using short strips of black electrical tape. Ensure the adhesive tape covers only the outermost rim of the glass without blocking any portion of the clear aperture. Check the exterior of the box to verify that no tape edges overlap the visible lens face.
For modular designs, some builders mount the lens inside a sliding inner cardboard collar rather than the fixed exterior wall. A sliding collar allows you to adjust optical focus by moving the lens rather than shifting the smartphone cradle inside. Both configurations work reliably, though fixing the lens directly to the outer box remains the simpler method.
Constructing a Stable Smartphone Cradle
The smartphone must stand upright inside the box without leaning, wobbling, or sliding during playback. A simple stand made from folded cardboard, thick florist foam, or large binder clips works well. Cut two small notches into a rectangular cardboard base so your phone slides in snugly without tipping.
Ensure the cradle holds the display perpendicular to the bottom panel and parallel to the installed lens face. Any rotational tilt causes uneven focus across the screen, leaving one side sharp while the opposite side remains blurry. The phone stand must also be easily movable along the length of the box floor for focal adjustments.
If you plan to power your phone during long videos, cut a small access slot in the rear panel for a charging cable. Secure the cable with tape so its weight does not pull your cradle out of alignment. Keeping the phone firmly positioned ensures repeatable projection geometry every time you open the box.
Managing Screen Orientation and Optical Inversion
A convex lens naturally refracts incoming light rays so that they cross at the focal point before reaching the wall. This fundamental law of optics causes the projected image on your wall to appear upside down and mirrored horizontally. Compensating for this physical inversion requires adjusting your smartphone software settings before inserting it into the box.
Lock your phone screen rotation and simply flip the device upside down inside the support cradle. While turning the phone upside down corrects the vertical inversion, horizontal mirroring can still reverse on-screen text. On Android devices, accessibility settings or developer options sometimes provide screen-mirroring toggles to flip the display horizontally.
For iOS platforms, users often install specialized video player applications that feature built-in video flip modes. Third-party media players frequently include dedicated mirror controls to flip video horizontally for rear-projection setups. Taking care of screen orientation before starting your movie ensures subtitles and title cards remain fully readable.
Focusing the Image and Calculating Throw Distance
Optical focus depends on the exact relationship between the phone display, the lens curvature, and the projection surface. Placing your phone closer to the lens than its natural focal length prevents the formation of any real image on the wall. The phone must sit just beyond the lens focal point to cast an enlarged image forward.
To calibrate focus, position the entire box approximately four to six feet away from a smooth white wall. Turn the room lights off completely and slide the phone cradle forward and backward inside the box. Watch the wall until high-contrast details, such as video player icons, become sharp and crisp.
Once you achieve the sharpest possible picture, mark the cradle position on the box floor with a pencil. This reference line allows you to return to the proper focus position quickly during future movie sessions. If you move the box farther back to gain a larger picture, you must recalibrate the cradle distance accordingly.
Maximizing Brightness and Image Clarity
A smartphone screen produces far less light output than dedicated commercial projector bulbs. To extract the best possible brightness, set your phone display brightness slider to its maximum one hundred percent limit. Disable automatic brightness adjustments and battery-saving modes so the backlight does not dim midway through your media.
Clean your smartphone screen and the magnifying lens thoroughly with a microfiber cloth before closing the enclosure. Dust motes, fingerprint grease, and smudges on either glass surface cause severe light scattering and haziness. Clean optical surfaces allow maximum photonic transmission through the system, boosting picture clarity.
If you decide later to upgrade to dedicated hardware for backyard use, learning how many lumens a projector needs outside helps clarify light output requirements. Commercial units push hundreds or thousands of ANSI lumens, whereas DIY phone boxes deliver modest output suitable only for pitch-black indoor spaces. Maintaining realistic expectations ensures you enjoy the distinct charm of a handmade build.
Troubleshooting Common DIY Optical Problems
When an assembled phone projector produces disappointing visuals, following a methodical troubleshooting checklist helps isolate the issue:
- Check that ambient light is eliminated, as even a small hallway nightlight can overpower the projection.
- Inspect the lens for chromatic aberration or perimeter distortion caused by low-grade plastic magnifying lenses.
- Verify that the phone display sits perfectly parallel to the lens face to resolve one-sided blur.
- Ensure the phone screen auto-lock timer is disabled so playback does not turn off abruptly.
- Confirm the box lid forms a tight seal to prevent backlight glow from illuminating your projection surface.
If the projected picture appears excessively dim despite maximum screen brightness, consider reducing the throw distance. Moving the box closer to the wall concentrates the available lumens across a smaller footprint, doubling perceived screen brightness. A crisp thirty-inch picture offers a much more enjoyable viewing experience than a faint, washed-out eighty-inch spread.
Another common limitation involves spherical aberration, which causes the center of your video to stay sharp while edges look fuzzy. This optical flaw is common in inexpensive single-element magnifying glasses. You can reduce this blurring by cutting a circular cardboard mask with a slightly smaller hole to cover the outer lens perimeter.
Sound output is another factor that requires attention, as cardboard enclosures muffle internal phone speakers. Connecting a small external Bluetooth speaker placed near the projection wall dramatically improves audio quality and dialogue clarity. This separation also creates a more authentic home theater sensation during movie playback.
Comparing DIY Projects to Compact Retail Options
While building your own projector provides valuable insight into optics, portable commercial models offer distinct technological advantages. Compact electronic projectors incorporate high-powered LED or laser light engines along with dedicated cooling fans and digital processing. The product description highlights advanced features such as electronic keystone correction, remote focusing, and integrated streaming platforms.
For example, units like the Native 1080P Mini Projector Bluetooth utilize dedicated Type-C direct screen mirroring and high-output LED light sources. Other options such as the Smartphone Projector by Everything from Everywhere package pre-aligned optical magnifiers in pre-built housings for casual viewing. When selecting display gear, evaluating your specific balance of craft enjoyment versus immediate performance helps determine the best path forward.
Testing your cardboard creation in a pitch-black room with a favorite animated film or high-contrast video delivers great satisfaction. Taking the time to black out internal seams, align your phone display accurately, and calibrate the focal distance will reward you with a functional homemade movie night.
About the author
Most projector frustration is a setup problem: wrong throw distance, a bracket in the wrong spot, a cable that will not carry the signal. I write step by step guides for mounting, placement, connecting laptops, phones, and streaming sticks, and getting a straight, sharp picture. I like checklists and I try to say what to measure before you drill anything. My notes follow the site's review methods: research-based comparison, not lab testing.